Posts

Showing posts from September, 2021

How to Create Patterns in Adobe Illustrator
Image
  This blog is going to show you all the separate steps to create pattern in Adobe Illustrator. Step 1 . So the first step is you want to follow along this go file-> new and this is created document. Pick up the sizes whatever you want and hit create. The digital canvas is centered off we go. Step 2 . The next step is we want to create some a very basic art and we’re just basically creating the pattern that we want to repeat across the document. So, I’ll just go quickly here and the pattern can be like a square and any shape that you would like to work add into your pattern. Group the shapes formation you’ve created.   Step 3 . So, we’re on our way. Now the next step is I’m gonna make sure everything is selected. I’m going to window and go to pattern options. And this is where it starts to get weird because when you open pattern options to create a pattern, errors everything’s grayed out the whole kitten caboodle. You can’t do anything and that doesn’t make any sense to me.
Important Software to learn at Graphic Design Institute in Delhi

Image
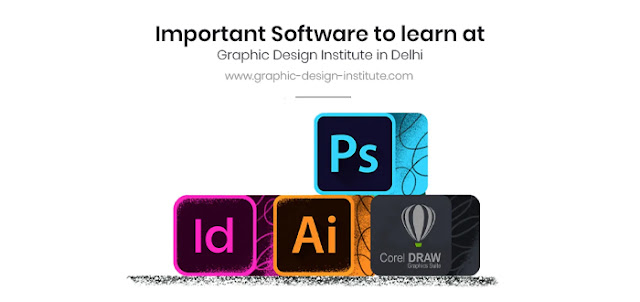
  You can make perfect drawings, artwork, logos, posters, illustrations, digital paintings, and much more by learning few graphic design software from an ideal graphic design training institute in Delhi. Hi, this is Ritu, I’m a graphic artist and your friend who is going to provide you some useful information related to graphic design software through this blog. In this piece of content, we will have a look at top 5 creative software applications that I learned and found a kind of must to learn for you too. These software are like keys to the doors of opportunities for you. And not skip if you really want to be a professional artist and designer. So, let’s get read. Adobe Photoshop I’m starting with one of my favorite software that I use the most and learnt at first. Photoshop is way better than any other tool when it comes to presenting the ideas on digital canvas. It deals with not only the editing of the pictures but also provides tools for designing. It has got tools like pen,

5 Quick Tips to Find Out the Best Graphic Design Training Institute in Delhi

Image
  Delhi is the place where you find aplenty of training institutions running in every corner of the city. They all are providing software training. Some of them are committed to make you a complete computer software operator and some are only want to make money and don’t even care about your learning experience. In such scenario, finding an ideal place to learn and acquire right skills is cocksure a difficult task to do. But if you have an idea about what you are required to learn and what qualities a reputed training institute possesses, you will not make any mistake while selecting the institute. In this blog, we are sharing the top 5 quick tips that will help you to scrutinize the best graphic design training institute and find your ideal one. Tip 1. Check the Google reviews In order to start your search; the best way is to check the Google reviews of the institute you have shortlisted. Nowadays most of the services providers are adding their business listings on Google where t

How to create Patterns in CorelDraw?

Image
  CorelDraw creates vector patterns. It has many tools to create vector drawings such as pen tool and shape tools. To create a basic pattern, you can start with Rectangle or ellipse tool. These tools come up with very few settings which make the pattern creation so easy for beginners. In this blog, we will create a pattern with the help of Rectangle tool and transformation options. So, let’s get started. Step 1. Select the Rectangle Tool Step 2. Create a square. For creating a square hold Control Key. Step 3. Fill any color you want in the square. To fill color in shape, click on left key of mouse and to fill color in outline click on right key. Step 4. Select the square using Pick tool and click on the center of it. It will enable the rotate and distort controls. Hold and drag the mouse on any side. You will see that the side is starting tilting. You will end up with a new shape. Step 5. Now create a copy of the new shape. To do so, hold the shape using left click of mouse

What are Shape Tools in Photoshop?

Image
  In order to create shapes in Photoshop, we have a complete set of tools that come into picture. In this blog, we will get to know what these tools are and how to use them in Adobe Photoshop to create figures. Let’s find out what sorts of things they can do and what are the advantages of using Shape tools. What are Shape Tools? Shape tools consist of Rectangle, Rounded Rectangle, Ellipse, Triangle, Polygon, Line, and custom shapes tool. This set of tools has a unique capability. It lets you decide whether you want to create a pixel based raster object, a path without any fill or a vector object. Once you decide this thing, you can create your forms and fill it with not only solid color but also gradient and patterns. Even null option is there that you can choice to fill no color. Stoke Apart from this, stroke option is given there that you can use to add stoke or outline to the shape. You can fill solid color as well as gradient and patterns in the outline, just like you did

Types of Masks and Global Light in Photoshop

Image
  Photoshop has got lot of options to compose images together for forming different scenes and masks play a big role in it. It is important to understand for every user who is learning this software or pursuing any Photoshop training course . In this blog we are going to talk about all the types of masks and their uses one by one in detail. This blog also explains the role of global light option which comes under the roof of layer styles in the software. Masking in Adobe Photoshop Masking in this photo editing software can be done in various ways. With masking we mean, to cover or uncover or in simple words visibility of a layer or invisibility of a layer. It works similarly like eraser tool but better from that because eraser is destructive and masks are not destructive. When we use erase tool, it permanently deletes the selected area but when it comes to masking, it just hides or unhide the content present in the layers. So, basically we can completely hide the unnecessary areas